Browser may distort images, so click on an image for full view
Viewing
Image 1 of 6
Use the Prev and Next buttons to view screenshots. Click on an image to view full size. Don't forget to use your Back button to return here.
- About
- Adding to Clipboard
- System Requirements
- Version Info
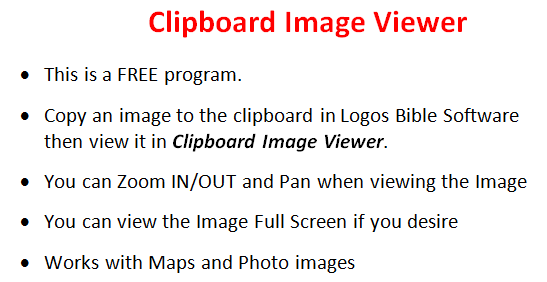
- The Clipboard Image Viewer is Free to use. No ADs, simply free.
- It simply allows you to view an image from your window's clipboard.
It will not alter the clipboard image either. - You can Pan (move the image around in the window or screen). You can also zoom IN/OUT by rolling the mouse wheel (or scroll with your touchpad). [added keyboard shortcuts in ver 1.0.1.0]
- Zooming centers over your mouse position.
- You can copy Maps or Images from your Logos Bible Software app to the clipboard and then use this program to zoom IN on that map or image.
- You can open as many instances of CIV as you wish. This allows you to view different maps side-by-side.
- CIV keeps up to the last 6 clipboard images that you have copied into CIV. This allows you to switch between previous clipboard images that were opened in an instance of CIV.
This tab tells you ways to add an Image or Map to the clipboard from your Logos Bible Software. Once in the clipboard you can use CIV
to view your image/map. There are 3 methods mentioned here, but
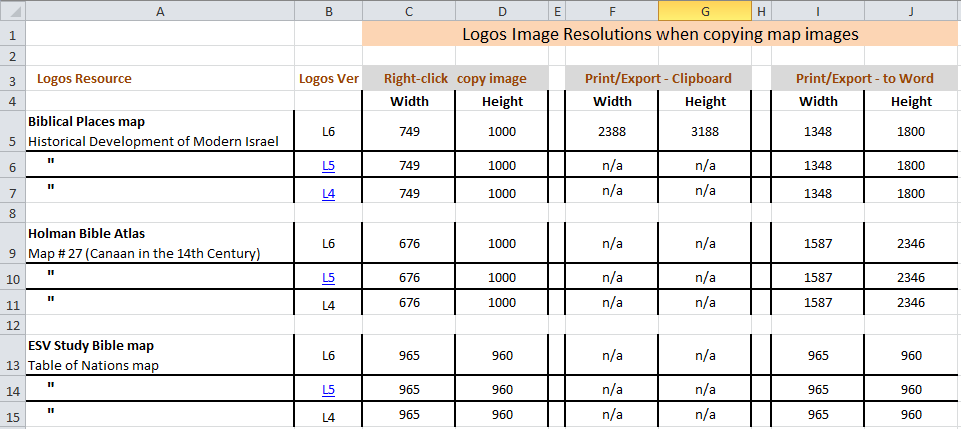
there may be others as well that are not mentioned. Below is a chart showing image resolutions for each method. The higher the resolution
better your image in CIV will look when zoomed.
[hint: all image below can be clicked and your browser will show you a larger view of the image]
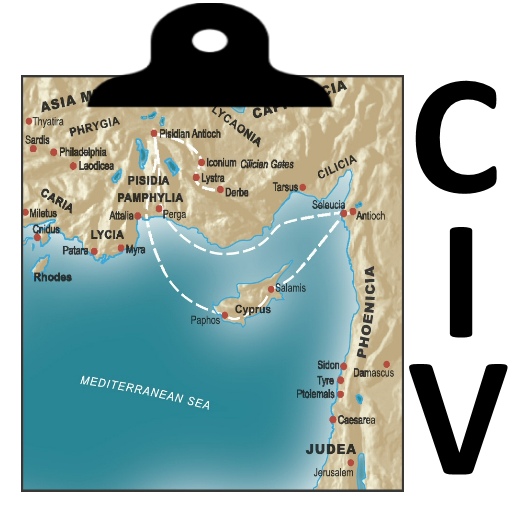
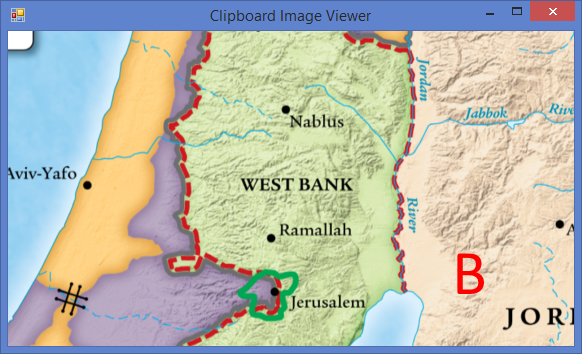
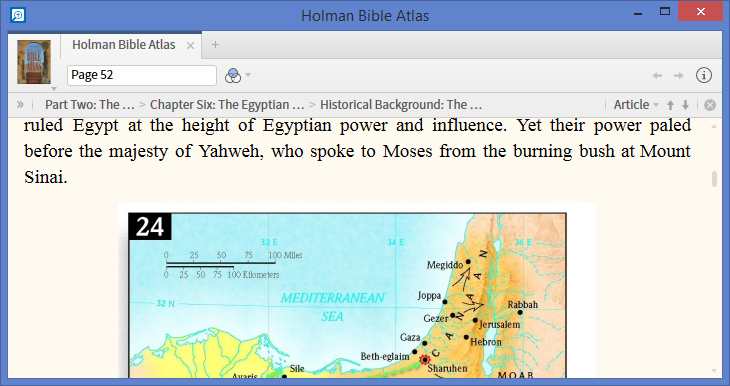
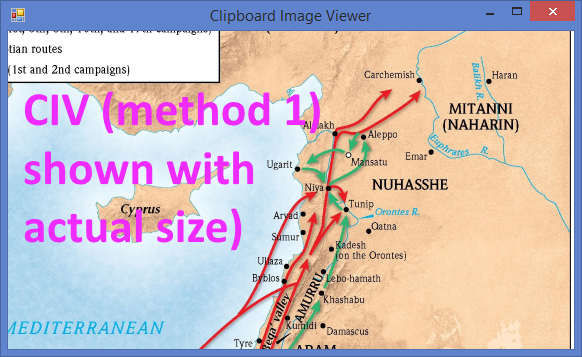
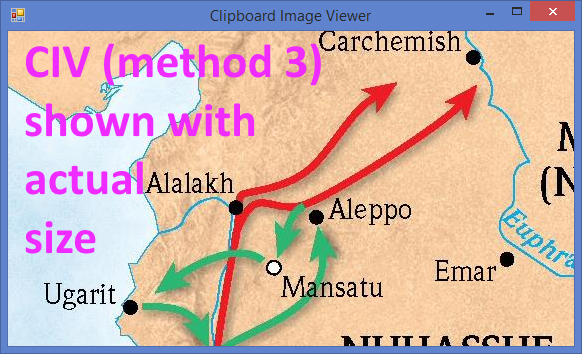
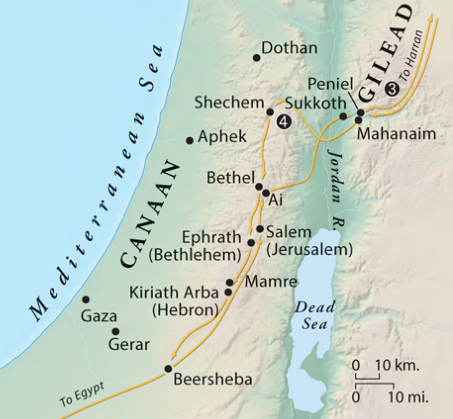
Below are images shown in CIV with images set to actual size (no zooming). Image A used Method 1 and image B used Method 3.
This shows the difference when getting higher resolution images into your clipboard and pasting them into CIV.
So when you do zoom in CIV, higher-res will allow you to zoom more with less pixelation! This can come in handy when you want
to take a screenshot of a portion of a map for pasting into a PowerPoint or another document.
(Method 1) Right-click Copy Image to Clipboard
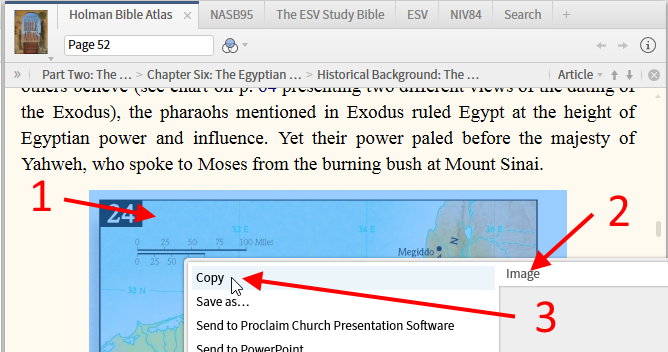
- Right-click on a Map or Image in your resource.
- In the popup menu on the Right side click on Image
- Then in the menu on the Left side click on Copy
- Next open Clipboard Image Viewer, it will automatically read the clipboard and show the image.
Or if Clipboard Image Viewer is already open, right-click and select new Image from Clipboard.
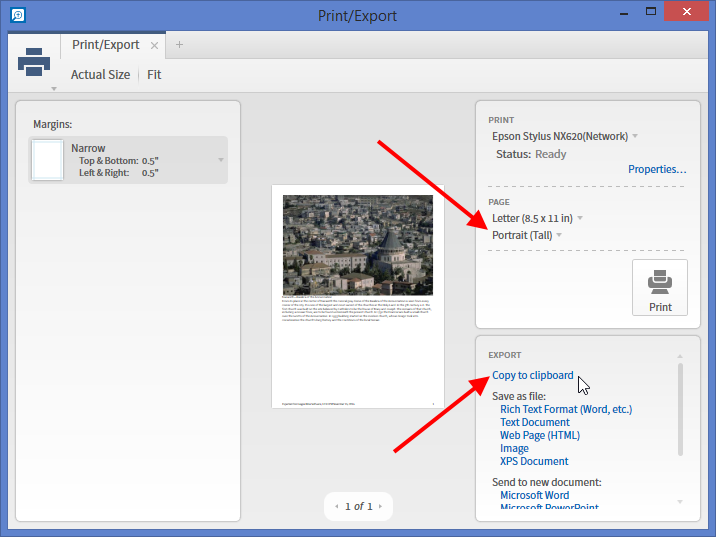
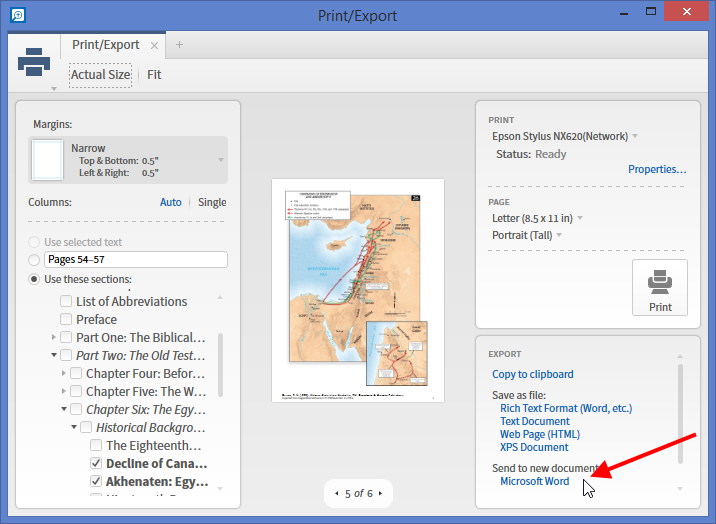
(Method 2) Print/Export - Copy to Clipboard
In some Media resources simple right-clicking may not copy the highest resolution image to your clipboard. But you can use Ctrl-P to open the Print/Export window in Logos. From there you can click on Copy to Clipboard. (This works in L6 with Biblical Places and in L5/L6 it works with images in some resources)
- Locate the map/image that you want to copy in your resource and make sure that it is visible.
- On your keyboard press the key combination Ctrl-P. Logos will open the Print/Export window.
- If your image is wider than it is tall, you may want to select the Landscape mode for the printer.
- Now click on the Copy to Clipboard link. (you can now close the Print/Export window in Logos)
- Next open Clipboard Image Viewer, it will automatically read the clipboard and show the image.
Or if Clipboard Image Viewer is already open, right-click and select new Image from Clipboard.
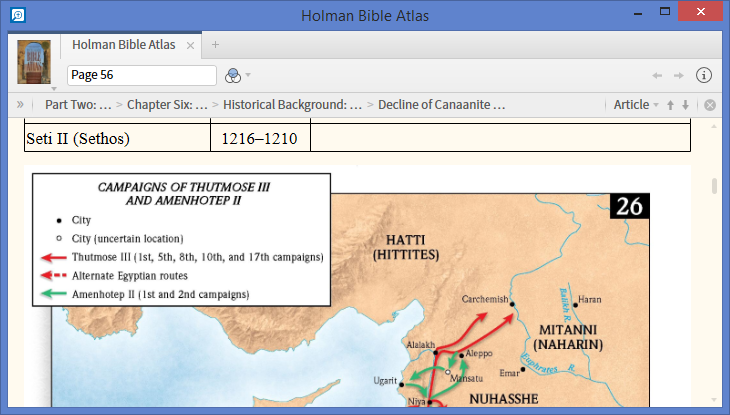
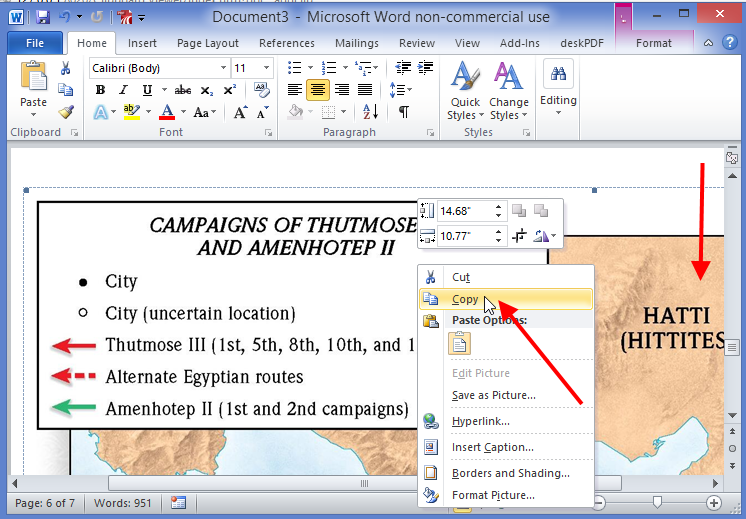
(Method 3) Print/Export - send to Word then copy from Word to Clipboard
In some Media resources simple right-clicking may not copy the highest resolution image to your clipboard. But you can use Ctrl-P to open the Print/Export window in Logos. From there you can copy it to a Word document and from Word you can copy it into the clipboard. Then you can view this higher resolution image in CIV.
- Locate the map/image that you want to copy in your resource and make sure that it is visible.
- On your keyboard press the key combination Ctrl-P. Logos will open the Print/Export window.
- If your image is wider than it is tall, you may want to select the Landscape mode for the printer.
- Now click on the Microsoft Word link. (you can now close the Print/Export window in Logos)
- Next in your taskbar click on Word (which Logos opened) to view microsoft's Word window. Scroll down until you see the image/map that you exported to Word. Then right-click on the image and in the popup menu click on Copy (this adds it to the clipboard).
- Next open Clipboard Image Viewer, it will automatically read the clipboard and show the image.
Or if Clipboard Image Viewer is already open, right-click and select new Image from Clipboard.
Below is a comparison of Method 1 & 3 using the image from method 3's instructions above (Holman Bible Atlas, map #26).
System Requirements
- Windows Vista SP3 or higher
- Logos Bible Software version 4 or higher
[actually works with any window's apps] - Processor / processor speed / RAM
[if your computer runs Logos Bible Software, you should be fine] - .NET Framework 4.5 (requires internet connection if not present on your computer)
- Hard-drive space, the program itself requires less than 50 MBytes
- You will need administrator privileges for your window's session to install this program!
- This is a Click-Once windows app. It will show up in your window's Start Menu under Clipboard Image Viewer
Release History
- Ver 1.0.4.0 Dec 1, 2015
-
Added the ability to copy a portion of the visible image to the clipboard.
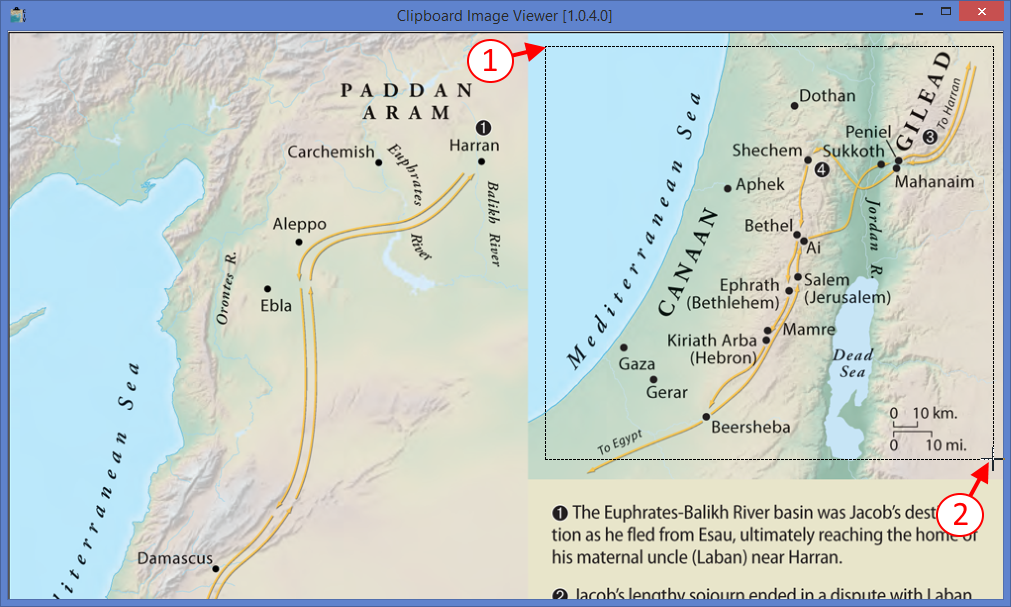
- Hold the Alt key down and position the mouse where you want to draw a rectangle for copying and press the Left button. (Keep the mouse button down and drag)
- Continue dragging the mouse (with the Left button pressed) and once you have your rectangle draw over the area that you wish to copy, then release the Left mouse button.
- CIV with then add the part of the image that you drew the rectangle around to the clipboard.
-
Now you can paste this portion of the image into Word or some other application.
- Ver 1.0.3.0 Sept 10, 2015
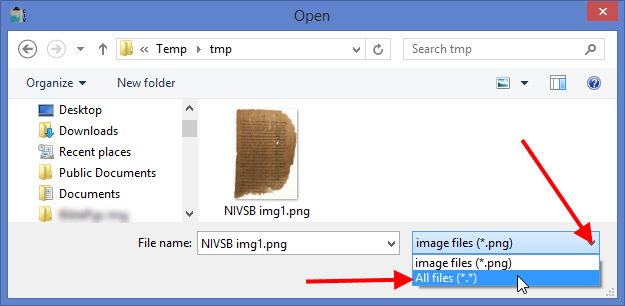
- Modified Load History Image to allow loading a single image (picture) file.
When loading a single image, it is added to the History.
(this can be handy when you have used Save As in Logos to save an image) -
You can select other image file types (i.e. JPG) in the popup file dialog window
by selecting All files
- Hint: when you use Save History Images, CIV saves them as .png files and appends _n to the end of each image file. The n is a sequential number from 0 to 5 (depending on the number of images that are in the History).
-
Added the ability to delete a single History entry.
Just go to the History and hold down the Shift key and click on the history image
that you want to delete.
Repeat these steps to delete other history images.
Warning: once a history image is deleted, it cannot be recovered. -
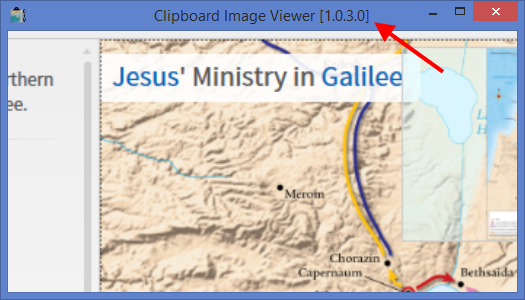
Added CIV version number in the Title-bar of the CIV window.
- Ver 1.0.1.8 June 24, 2015
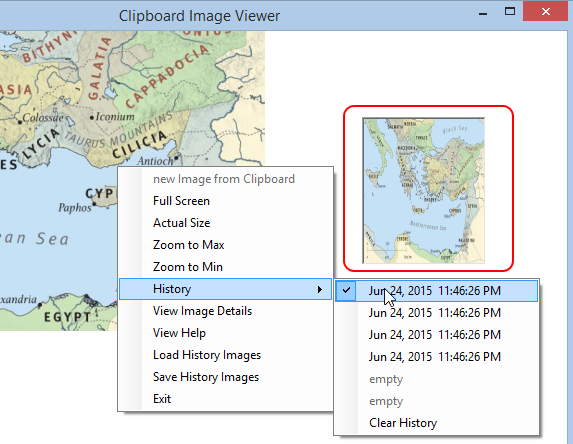
- Added popup thumbnail image when hovering over History items.
This will help you recognize what image is associated with which History item.
- Added Save History Images menu item which allows you to save history images to your hard-drive. When selected a popup Save File dialog window will appear, you will supply the base image filename. Then CIV will save the history images using the base filename with an appended number to each image.
-
Added Load History Images menu item which allows you to load images to CIV's history.
When selected a popup Open File dialog window will appear, when you click on an image CIV will load that image plus others which share the same base filename. - Ver 1.0.1.7 Dec 10, 2014
- Changed menu item View Image Details to show in a popup message box.
[previously toggled the image & showed text of details. Now the image is not disturbed.] - Ver 1.0.1.5 Nov 10, 2014
- Allow multiple instances of CIV to be opened.
[This allows you to have more than 1 CIV window open at the same time] - Added History to the right-click menu.
[This will allow you to view up to the last 6 clipboard images that you viewed in an instance of CIV] - Ver 1.0.1.3 Nov 8, 2014
- Prevent image from being moved out of window.
- Ver 1.0.1.2 Nov 8, 2014
- Changed keyboard zoom to use mouse location as focus point if inside window.
- Disabled mouse wheel usage when mouse is outside of window, mouse needs to be over image.
- Added CIV version number in help window.
- Ver 1.0.1.0 Nov 7, 2014
- Added keyboard shortcuts (see Help inside program).
- Initial Release Ver 1.0.0.0 (Nov 6, 2014)